Gluten-Free Strawberry Cake with Dairy-Free Strawberry Buttercream Recipe
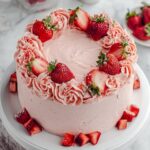
This fluffy gluten-free strawberry cake features layers made with a homemade strawberry reduction and is covered in a light, whipped strawberry buttercream frosting, making it a delightful summer dessert.
- Prep Time: 40 minutes
- Cook Time: 1 hour
- Total Time: 2 hours 10 minutes
- Yield: 10 Slices 1x
- Category: Dessert
- Method: Baking
- Cuisine: American
- Diet: Gluten Free
Ingredients
Units
Scale
Strawberry Reduction
- 4 1/2 cups (630g) fresh or frozen strawberries
- 1 tablespoon lemon juice
- 1 tablespoon granulated sugar
- pinch of fine sea salt
Strawberry Cake
- 2/3 cup (151g) dairy-free salted butter, room temperature
- 1 1/2 cups (300g) granulated sugar
- 2 tablespoons canola or vegetable oil
- 2 large eggs, room temperature *can sub liquid egg replacer for vegan
- 1 teaspoon vanilla extract
- 1 3/4 cup (280g) gluten-free flour blend *check to see if it contains xanthan or guar gum
- 2 teaspoons baking powder
- 1 teaspoon fine sea salt
- 1/2 teaspoon xanthan gum *omit if gf blend contains it or using regular cake flour
- 1/2 cup (117ml) strawberry reduction, room temperature
- 1/4 cup (59ml) dairy-free milk, room temperature
- optional: 2-3 drops of pink gel food color
- optional: extra strawberries for decor
- optional: gluten-free sprinkles for decor
Strawberry Buttercream
- 2 cups (480g) dairy-free salted butter, room temperature
- 5 1/2 cups (660g) icing sugar
- 1 teaspoon fine sea salt
- 1/4 cup (59ml) strawberry reduction
- 1/2 teaspoon lemon juice
Instructions
- Strawberry Reduction: Thaw the strawberries if using frozen. In a food processor or large blender, combine all of the strawberry reduction ingredients and blend them to a smooth puree. Strain seeds if desired. Pour the strawberry puree into a large heavy-bottomed pot and begin to cook on high. Reduce the heat to medium-low as soon as a boil is reached and allow it to gently simmer until the strawberry puree reduces by half. Whisk occasionally. This should take approximately 25-30. Remove the strawberry reduction from the heat and pour it into a shallow container. Allow to fully cool to room temperature. *There should be approximately 1 – 1 ¼ cups of strawberry reduction after cooking.
- Strawberry Cake: Preheat the oven to 350ºF and prepare two 8-inch round baking pans with non-stick baking spray and parchment paper. In the bowl of a stand mixer or large mixing bowl with an electric handheld mixer, cream the butter, sugar, and oil on high speed for 2 minutes or until light and fluffy. Add in the eggs and vanilla extract and mix on high for another minute. Scrape down the sides of the bowl when necessary. Add in the flour, baking powder, salt, and xanthan gum (if using) and turn the mixer on low. While the mixer is on low slowly pour in the strawberry reduction and milk. If using food coloring, add it at this point. Mix until just combined. Scrape down the sides of the bowl when necessary. Divide the cake batter evenly into the two prepared 8-inch round baking pans and bake for approximately 25-30 minutes or until a toothpick inserted in the center comes out clean. Remove from the oven and allow to cool on a cooling rack for 10 minutes. Invert the cake layers on the cooling rack and allow them to fully cool. If freezing the cake layers for a later time, wrap them tightly with plastic wrap and place them in the freezer.
- Strawberry Buttercream: In the bowl of a stand mixer with the paddle attachment cream the butter on high for 5-10 minutes until light and fluffy. Scrape down the sides of the bowl when necessary. Add in the icing sugar and salt and mix on low until combined. Add in the strawberry reduction and lemon juice and mix on low until combined. Turn the mixer to high and allow to beat for 5 minutes until light and fluffy.
- Cake Assembly: Level each fully cooled strawberry cake layer with a cake leveler or knife if needed. Place one leveled layer of cake on a cake board, plate, and/or cake turntable and top with approximately 2 cups of strawberry buttercream. Pipe a buttercream border around the edge and fill with the remaining strawberry reduction. Top with the remaining cake layer and very gently apply a thin coat of buttercream to all of the cake. Chill the cake for 20 minutes. *If the cake feels unstable or the buttercream becomes too soft at any point while stacking, stop and chill the cake and frosting for 15 minutes. Cover the cake with a final layer of buttercream and smooth the sides and top with a cake smoother and/or offset spatula. Place back in the fridge to chill while you prepare the piping bag and strawberries for decor. Decorate the cake as you please. I piped strawberry buttercream rosettes and drop flowers with a Wilton 1M piping tip and topped with fresh strawberries and sprinkles. Enjoy! Store leftovers in an airtight container in the fridge for up to 7 days or in the freezer for up to 6 months.
Notes
- There should be approximately 1 – 1 ¼ cups of strawberry reduction after cooking.
- Scrape down the sides of the bowl when necessary during mixing.
- If freezing the cake layers for a later time, wrap tightly with plastic wrap and freeze.
- If the cake feels unstable or the buttercream becomes too soft at any point while stacking, chill the cake and frosting for 15 minutes before continuing.
- Store leftovers in an airtight container in the fridge for up to 7 days or in the freezer for up to 6 months.