
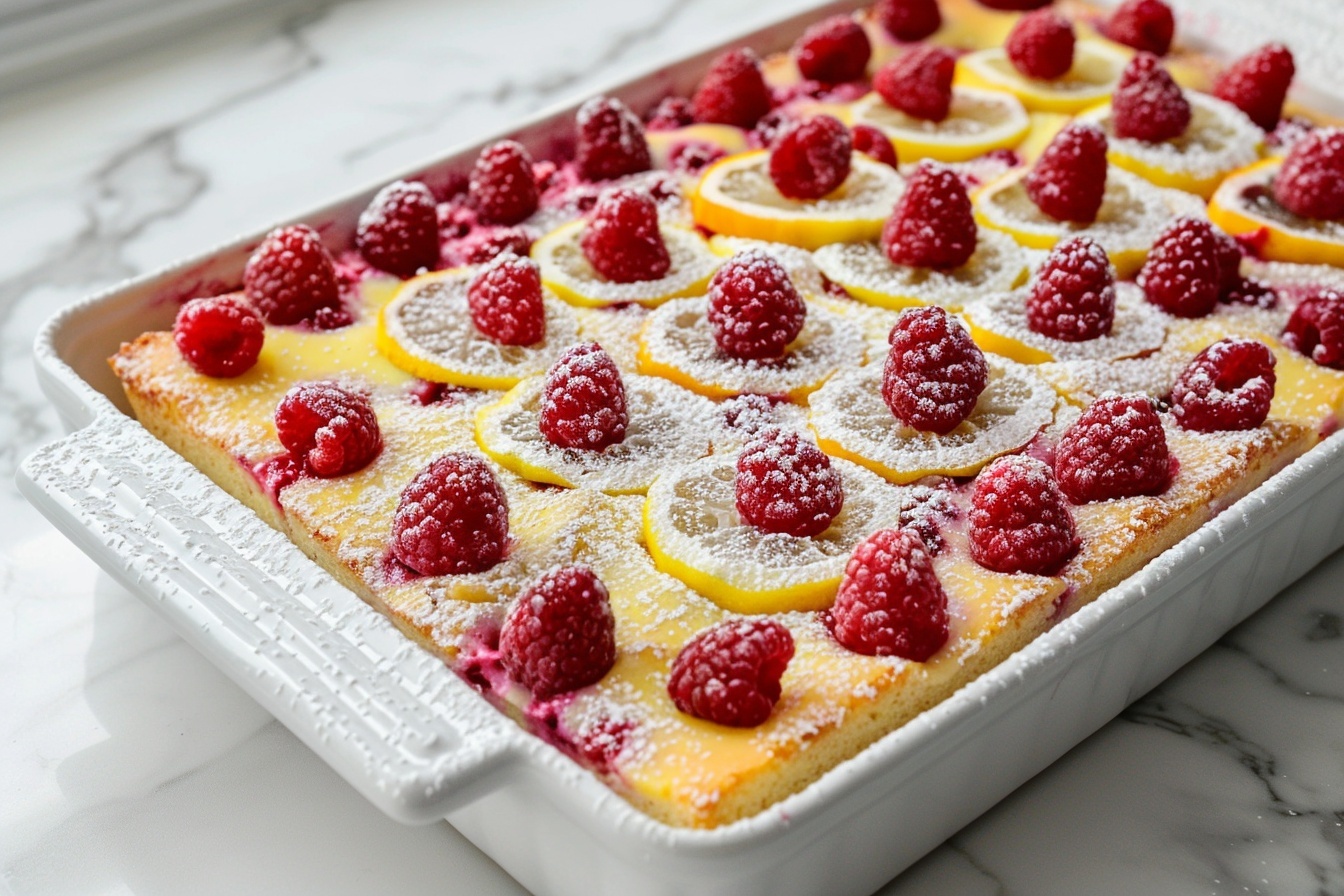
Imagine the vibrant, tangy aroma of fresh lemons mingling gracefully with the delicate, floral whisper of hibiscus as it fills your kitchen. These Hibiscus Lemon Bars: Refreshing Treat with a Floral Twist Recipe is more than just a dessert; it’s a delightful experience—a bright, buttery treat with just the right hint of floral magic to brighten any day. The subtle crimson hue peeking through a golden crust is nothing short of captivating, inviting you to indulge in every luscious bite.
Why You’ll Love This Hibiscus Lemon Bars: Refreshing Treat with a Floral Twist Recipe
- Unforgettable Flavor Combo: The lively tang of lemon pairs perfectly with the enchanting floral notes of hibiscus, creating a balance that dances on your taste buds.
- Simple Ingredients: With easy-to-find pantry staples like butter, sugar, and eggs, plus dried hibiscus flowers and fresh lemon juice, this recipe feels accessible yet special.
- Perfect for Sharing: Whether a cozy family dessert or a surprise for friends, these bars impress without demanding complicated steps.
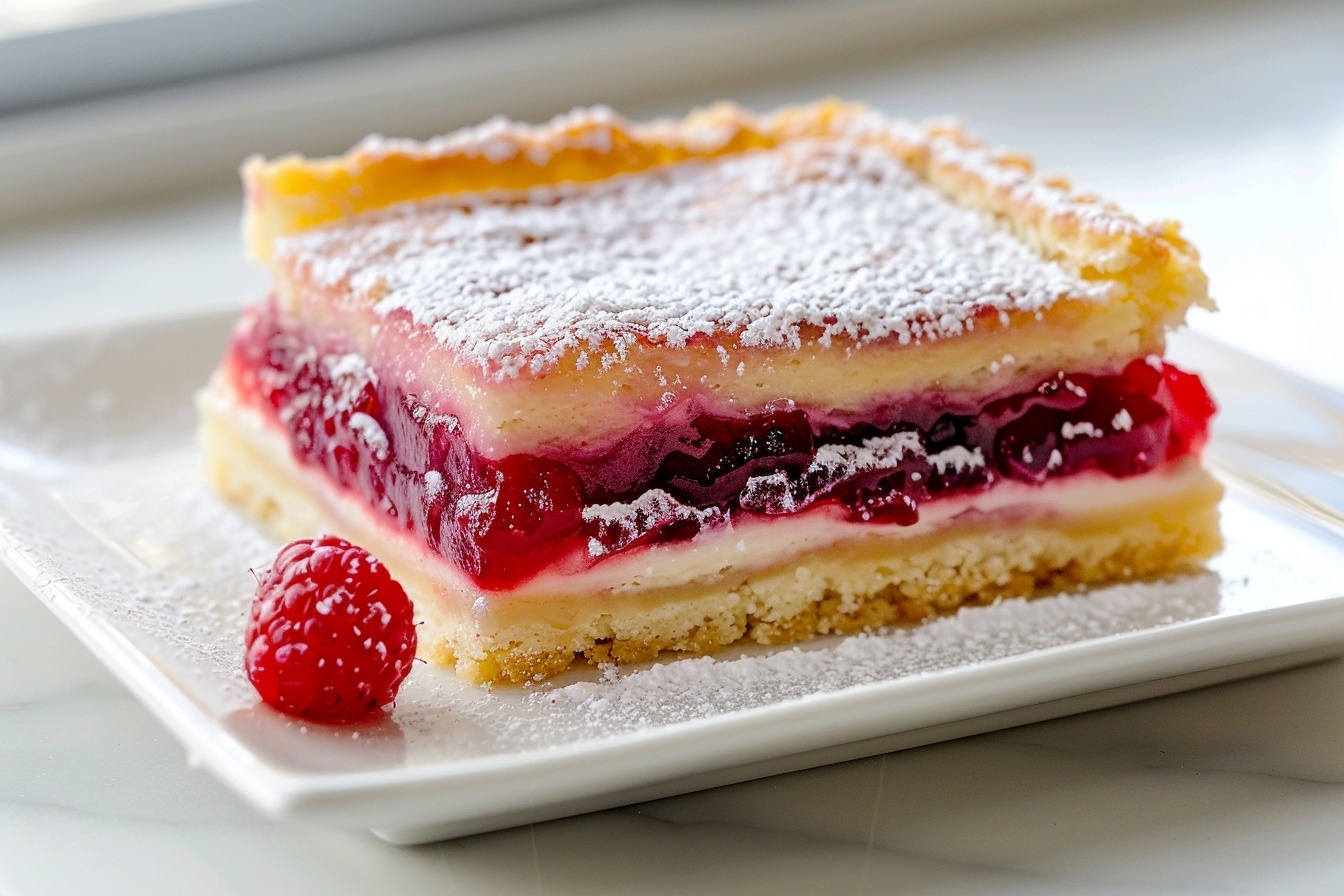
- Stunning Presentation: The rich, buttery crust contrasts beautifully with the vibrant pink filling, dusted with a delicate layer of confectioner’s sugar for a clean, elegant finish.
- Customizable and Adaptable: From vegan butter swaps to gluten-free flour options, this recipe easily adjusts to fit your dietary needs and taste preferences.
Why This Hibiscus Lemon Bars: Refreshing Treat with a Floral Twist Recipe Works
This recipe shines thanks to thoughtful techniques and key ingredient pairings. The buttery crust provides a rich base that supports the delicate filling without overpowering it. Pressing the dough into a 9×9 inch pan and chilling it before baking ensures a crisp texture that holds up well to the luscious custard. The magic truly happens when dried hibiscus flowers are steeped in fresh lemon juice, releasing both vibrant color and subtle floral notes that infuse the filling. Baking until just set guarantees a velvety consistency that cuts cleanly into squares, making every bar a picture-perfect, flavor-packed delight.
Ingredients You’ll Need
Let’s talk about the star ingredients that’ll make your hibiscus lemon bars unforgettable. Each element plays a special role, turning simple pantry staples into a refined, floral dessert.
- Butter (0.5 cup): Provides richness and structure. Use vegan butter for a dairy-free option.
- Granulated Sugar (1 cup): Adds sweetness. Can replace with coconut sugar for a lower glycemic index.
- Vanilla Bean Paste (1 Tbsp): Enhances flavor depth. Use pure vanilla extract (½ tsp) as a substitute.
- All-Purpose Flour (1.5 cups): Forms the base and thickens the filling. Gluten-free flour can be used.
- Salt (pinch): Balances sweetness and enhances flavors.
- Dried Hibiscus Flowers (1 cup): Adds floral flavor and color. Use powdered hibiscus or hibiscus tea if unavailable.
- Fresh Lemon Juice (0.5 cup): Provides tanginess. Ensure it’s fresh for best flavor.
- Eggs (3): Contributes to custardy texture. Use flaxseed meal or chickpea flour for vegan.
Ingredient Substitutions & Tips
- Butter: Swap for vegan butter to keep this recipe dairy-free without compromising flavor or texture.
- Granulated Sugar: Coconut sugar works wonderfully to lower the glycemic index and adds a subtle caramel note.
- Vanilla Bean Paste: Pure vanilla extract in half the quantity is a handy substitute that keeps the flavor rich.
- All-Purpose Flour: Use gluten-free flour blends to accommodate gluten sensitivities while maintaining a great crust.
👨🍳 Pro Tips for Perfect Results
- Use Cold Butter: Chilling the butter before mixing helps achieve a flakier, crispier crust.
- Don’t Overmix the Dough: Combine just until ingredients come together to avoid a tough crust.
- Steep Hibiscus Properly: Allow flowers to steep fully in lemon juice for a vibrant color and intense floral flavor.
- Watch Your Bake Time: The filling should be set but still slightly wobbly in the center when you take it out.
- Chill Before Slicing: Cooling completely and refrigerating for 30 minutes helps bars slice cleanly without crumbling.
How to Make Hibiscus Lemon Bars: Refreshing Treat with a Floral Twist Recipe
Step 1: Preheat the oven
Begin by setting your oven to 350°F (175°C). This preheating step warms the oven to the perfect temperature to bake your crust evenly and produce that golden finish you’re aiming for. Get all your ingredients and tools ready so you can move through the steps smoothly.
💡 Pro Tip: Line or grease your 9×9 inch pan before you start for easy removal.
Step 2: Cream butter, sugar, and vanilla
Beat together butter, granulated sugar, and the fragrant vanilla bean paste until the mixture feels light and fluffy, which usually takes around 3-4 minutes. This step is where the richness begins to build.
💡 Pro Tip: Use room temperature butter to help it cream perfectly with the sugar.
Step 3: Mix dry ingredients
Slowly add in the flour and a pinch of salt, folding gently until all is just combined. Avoid overmixing here, as it can toughen your crust—remember, delicate and tender is the goal.
💡 Pro Tip: Use a spatula or wooden spoon for better control over mixing.
Step 4: Press and chill crust
Press the dough evenly into the bottom of your prepared pan. A firm hand will help create an even layer that bakes uniformly. Once you’ve shaped your crust, pop it into the refrigerator for 15 minutes to help it firm up before baking.
💡 Pro Tip: Use the bottom of a measuring cup to smooth the dough flawlessly.
Step 5: Bake crust
Place your chilled crust in the oven and bake for about 15 minutes until the edges develop a light golden-brown color. The aroma will be buttery and inviting.
💡 Pro Tip: Keep an eye on the crust to avoid burning the edges.
Step 6: Prepare hibiscus infusion
Meanwhile, steep your dried hibiscus flowers in fresh lemon juice for approximately 15 minutes. This waiting time allows the natural color and floral flavors to infuse fully, turning your lemon juice into a gorgeous pink elixir. Then strain out the flowers, leaving a vibrant, fragrant liquid.
💡 Pro Tip: Use a fine mesh sieve to avoid bits in your filling.
Step 7: Mix filling
Whisk together the eggs and granulated sugar until frothy and light, adding airiness. Then stir in your glowing hibiscus-infused lemon juice; watch how the pink hues swirl with creamy egg mixture—this is the heart of your bars.
💡 Pro Tip: Fresh eggs make a noticeable difference in texture.
Step 8: Assemble and bake
Pour the luscious filling cautiously over the baked crust, spreading evenly. Bake again for 20-25 minutes until the center sets but retains a slight jiggle, promising a creamy, custardy texture once cooled.
💡 Pro Tip: Avoid overbaking to keep the filling tender.
Step 9: Cool and serve
After removing from the oven, let your bars cool completely to firm up. Finally, dust generously with confectioner’s sugar to add a delicate sweetness and beautiful finish before slicing into delightful squares.
💡 Pro Tip: Chill the bars for at least 30 minutes to get sharp, clean cuts.
Common Mistakes to Avoid
Learn from these common pitfalls:
- Overmixing the crust: Can lead to tough, dense bars instead of a tender, flaky base.
- Not chilling the crust: Pressing and refrigerating prevents shrinking and uneven baking.
- Understeeping hibiscus: Results in dull flavor and a less vibrant color.
- Overbaking the filling: Causes a dry or cracked surface rather than smooth custard.
- Cuts before cooling: Bars may crumble and lose their shape.
- Using bottled lemon juice: Fresh lemon juice offers brightness that’s essential here.
Delicious Variations to Try
Once you’ve mastered this Hibiscus Lemon Bars: Refreshing Treat with a Floral Twist Recipe, feel free to tweak the flavors and presentation!
Lavender Infusion
Add a teaspoon of culinary lavender while steeping the hibiscus flowers for a more layered floral aroma.
Coconut Crust
Swap half of the butter for coconut oil and add shredded coconut to the crust for tropical notes that pair beautifully with hibiscus and lemon.
Berry Swirl
Gently swirl in a fresh raspberry or blueberry puree into the filling before baking to introduce a vibrant fruity contrast.
Tea-Infused Filling
Replace half the lemon juice with cooled hibiscus tea to deepen the flavor and add subtle earthiness.
Nutty Crunch
Add toasted almond slices onto the crust before baking for a textural contrast that elevates every bite.
How to Serve Hibiscus Lemon Bars: Refreshing Treat with a Floral Twist Recipe
Garnishes
Top with a light dusting of powdered sugar, a few edible hibiscus petals, or a small sprig of fresh mint to enhance the visual appeal and aroma.
Side Dishes
Pair these bars with a dollop of whipped cream or a small scoop of vanilla bean ice cream for a luscious treat. They also complement light herbal teas, especially green or jasmine varieties.
Creative Ways to Present
Arrange bars on a rustic wooden board along with a scattering of fresh citrus slices or edible flowers for an irresistible dessert display that sparks conversation.
Make Ahead and Storage
Make-Ahead Instructions
You can prepare the crust and filling up to the baking stage ahead of time; keep the crust chilled and the filling refrigerated.
Storage
Store baked bars in an airtight container in the refrigerator for up to 4 days to maintain freshness and texture.
Freezing
These bars freeze well—wrap tightly and keep frozen for up to 1 month. Thaw overnight in the fridge before serving.
Reheating
Enjoy chilled or warm slightly in the oven at low heat (275°F) for 5-7 minutes for that fresh-baked feel.
Expert Tips for Success
- Use high-quality dried hibiscus flowers for the best flavor and color intensity.
- Be patient when chilling the crust so it bakes evenly and crisply.
- Strain the hibiscus infusion carefully to avoid gritty textures in the filling.
- Monitor baking times closely to ensure a smooth, custardy filling.
- Let bars cool completely before slicing to keep each piece intact.
Frequently Asked Questions
Can I make these bars vegan?
Absolutely! Use vegan butter in the crust and substitute eggs with flaxseed meal or chickpea flour to keep them plant-based.
What if I don’t have dried hibiscus flowers?
You can use powdered hibiscus or strong hibiscus tea concentrate as a flavorful alternative.
Can I use bottled lemon juice?
For the brightest flavor, fresh lemon juice is best, but bottled juice can be used in a pinch with slightly muted tanginess.
How do I get clean slices?
Chill your bars fully and use a sharp, warm knife wiped clean between cuts.
Can I make these gluten-free?
Yes, substitute all-purpose flour with a gluten-free blend that matches 1:1 for flour measurement.
How long do these bars last?
Stored properly in the refrigerator, they stay fresh and delicious for up to 4 days.
Can I prepare these for a party?
Definitely! They’re excellent for entertaining, and you can make them ahead of time to reduce stress.
Final Thoughts
There’s something truly special about sharing a dessert that feels both indulgent and fresh, and these Hibiscus Lemon Bars: Refreshing Treat with a Floral Twist Recipe delivers exactly that. The vibrant floral notes combined with zesty lemon and a satisfyingly buttery crust make each bite a little celebration. I encourage you to give this recipe a try—it’s perfect for brightening up your dessert rotation and bringing smiles around your table. Enjoy every luscious, colorful slice!
PrintHibiscus Lemon Bars: Refreshing Treat with a Floral Twist Recipe
These Hibiscus Lemon Bars offer a refreshing and tangy floral twist on classic lemon bars, combining the vibrant flavor of hibiscus with a buttery crust and a custardy lemon filling.
- Prep Time: 20 minutes
- Cook Time: 40 minutes
- Total Time: 1 hour 30 minutes
- Yield: 9 servings 1x
- Category: Dessert
- Method: Baking
- Cuisine: American
- Diet: Vegetarian
Ingredients
For the crust:
- 0.5 cup Butter (Provides richness and structure. Use vegan butter for a dairy-free option.)
- 1 cup Granulated Sugar (Adds sweetness. Can replace with coconut sugar for lower glycemic index.)
- 1 Tbsp Vanilla Bean Paste (Enhances flavor depth. Use pure vanilla extract (1/2 tsp) as a substitute.)
- 1.5 cups All-Purpose Flour (Forms the base and thickens the filling. Gluten-free flour can be used.)
- pinch Salt (Balances sweetness and enhances flavors.)
For the filling:
- 1 cup Dried Hibiscus Flowers (Adds floral flavor and color. Use powdered hibiscus or hibiscus tea if unavailable.)
- 0.5 cup Fresh Lemon Juice (Provides tanginess. Ensure it’s fresh for best flavor.)
- 3 Eggs (Contributes to custardy texture. Use flaxseed meal or chickpea flour for vegan.)
Instructions
- Preheat the oven and prepare: Preheat the oven to 350°F (175°C) and gather all ingredients and equipment.
- Cream the butter mixture: Cream together butter, granulated sugar, and vanilla bean paste until light and fluffy, about 3-4 minutes.
- Mix dry ingredients: Gradually mix in flour and salt until just combined; do not overmix.
- Chill the dough: Press the dough into the bottom of a greased 9×9 inch pan and refrigerate for 15 minutes.
- Bake the crust: Bake the crust for about 15 minutes until the edges are light golden brown.
- Steep hibiscus: Steep dried hibiscus flowers in fresh lemon juice for about 15 minutes, then strain.
- Prepare filling: Whisk together eggs and granulated sugar until frothy, then mix in the hibiscus-infused lemon juice.
- Assemble and bake: Carefully pour the filling over the crust and bake for 20-25 minutes until set.
- Cool and serve: Cool completely, then dust with confectioner’s sugar before slicing into squares.
Notes
- Use vegan butter for a dairy-free option.
- Granulated sugar can be replaced with coconut sugar for a lower glycemic index.
- Pure vanilla extract (½ tsp) can substitute for vanilla bean paste.
- Gluten-free flour can be used instead of all-purpose flour.
- Powdered hibiscus or hibiscus tea can replace dried hibiscus flowers if unavailable.
- Fresh lemon juice is best for optimal flavor.
- For a vegan version, substitute eggs with flaxseed meal or chickpea flour.